Branches
Create and switch branches, save commits, and open change requests in the Istari Digital web app to iterate on a System's composition while keeping work isolated and reviewable.
For how Resource versions and System branches fit together conceptually, see Version control.
Creating branches, committing changes, and merging change requests all require the Editor role or above on the System. Viewers can browse branches, commits, and change requests but cannot change them.
Create a branch
Requires Editor or above.
- Open a System and click the branch name in the left panel to open the branch switcher.
- Select New Branch.
- In the Create a new branch dialog, choose the Source branch and enter a name for the new branch.
- Click Create branch.
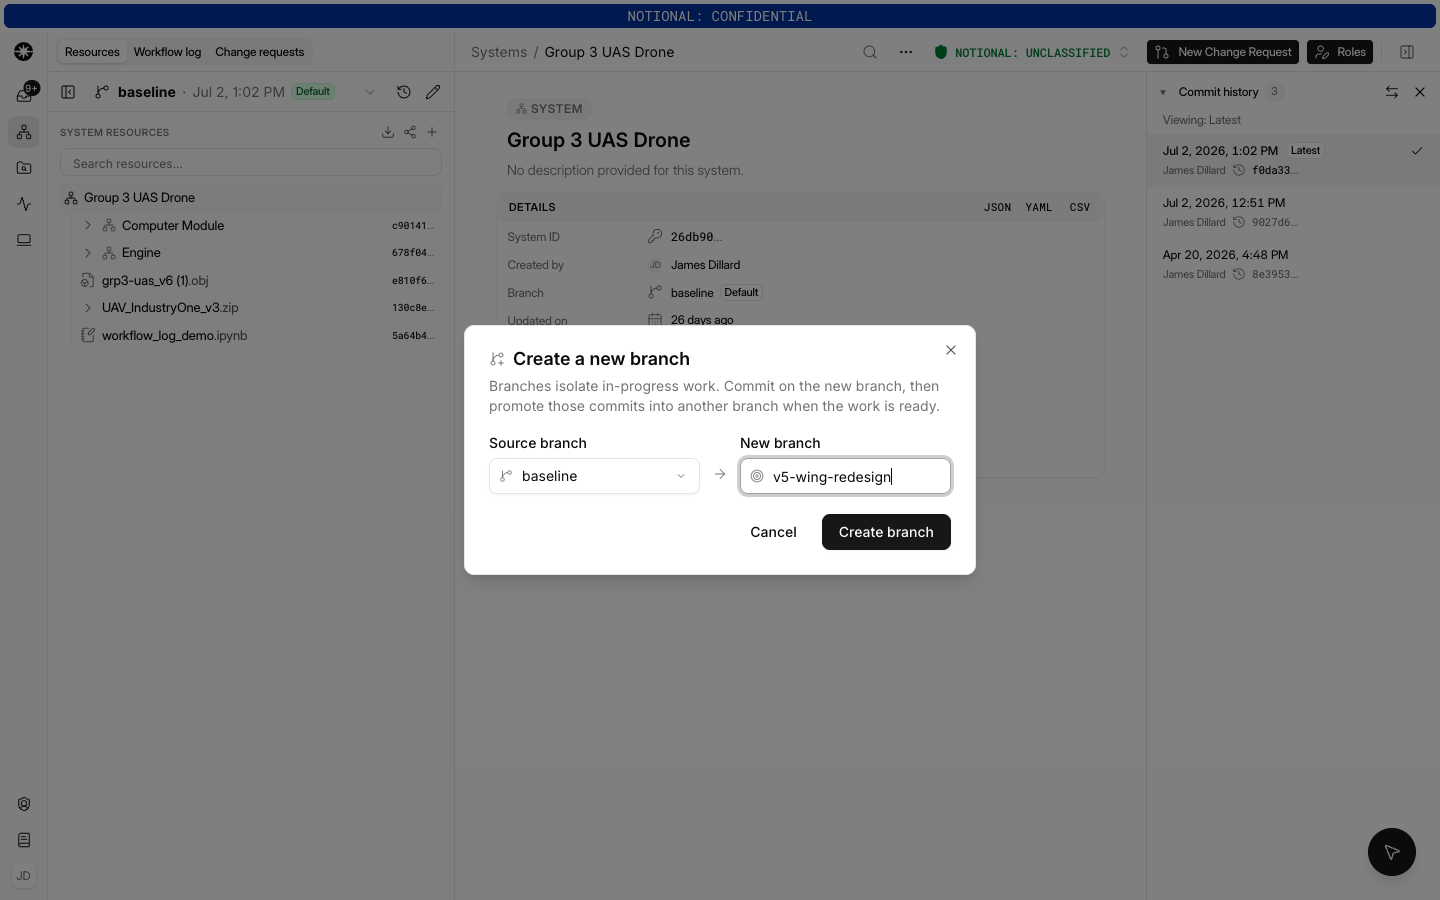
Branches isolate in-progress work: commit on the new branch, then promote those commits into another branch when the work is ready.
Switch branches
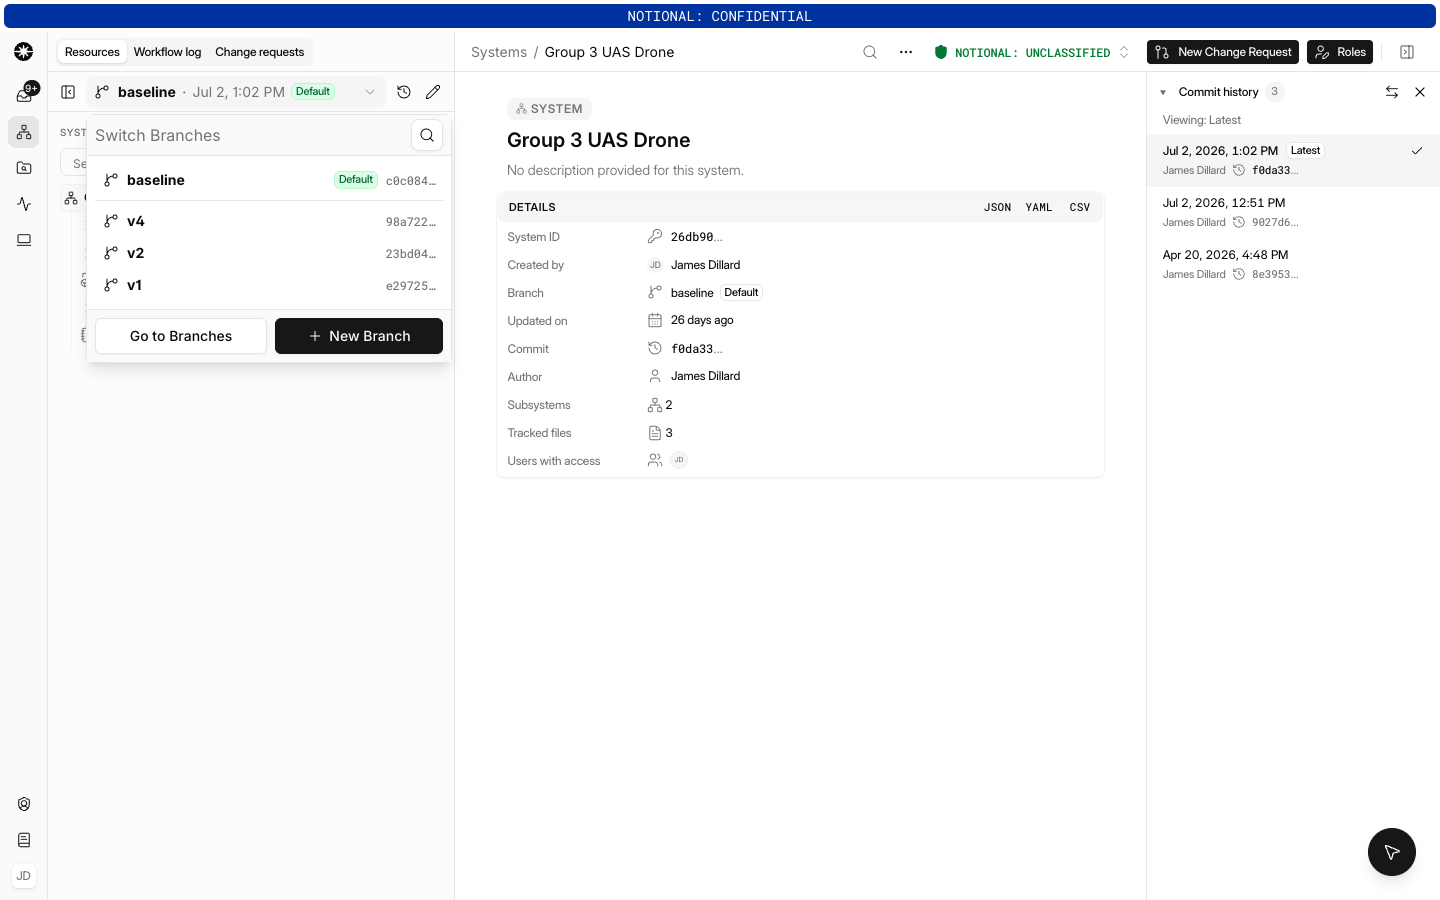
- Click the branch name in the left panel.
- Search or select a branch from the list to load its latest commit and file tree, or select Go to Branches to browse every branch in the System.
Edit a branch
- Select the branch you want to change.
- Click Edit files in the left panel, then add or remove Resources, folders, or Subsystems.
- Click Save. Each save creates a new commit on the branch.
Folder layout is per branch and is saved as part of the commit. For creating and organizing folders in the Resource tree, see Folders.
Archive and restore branches
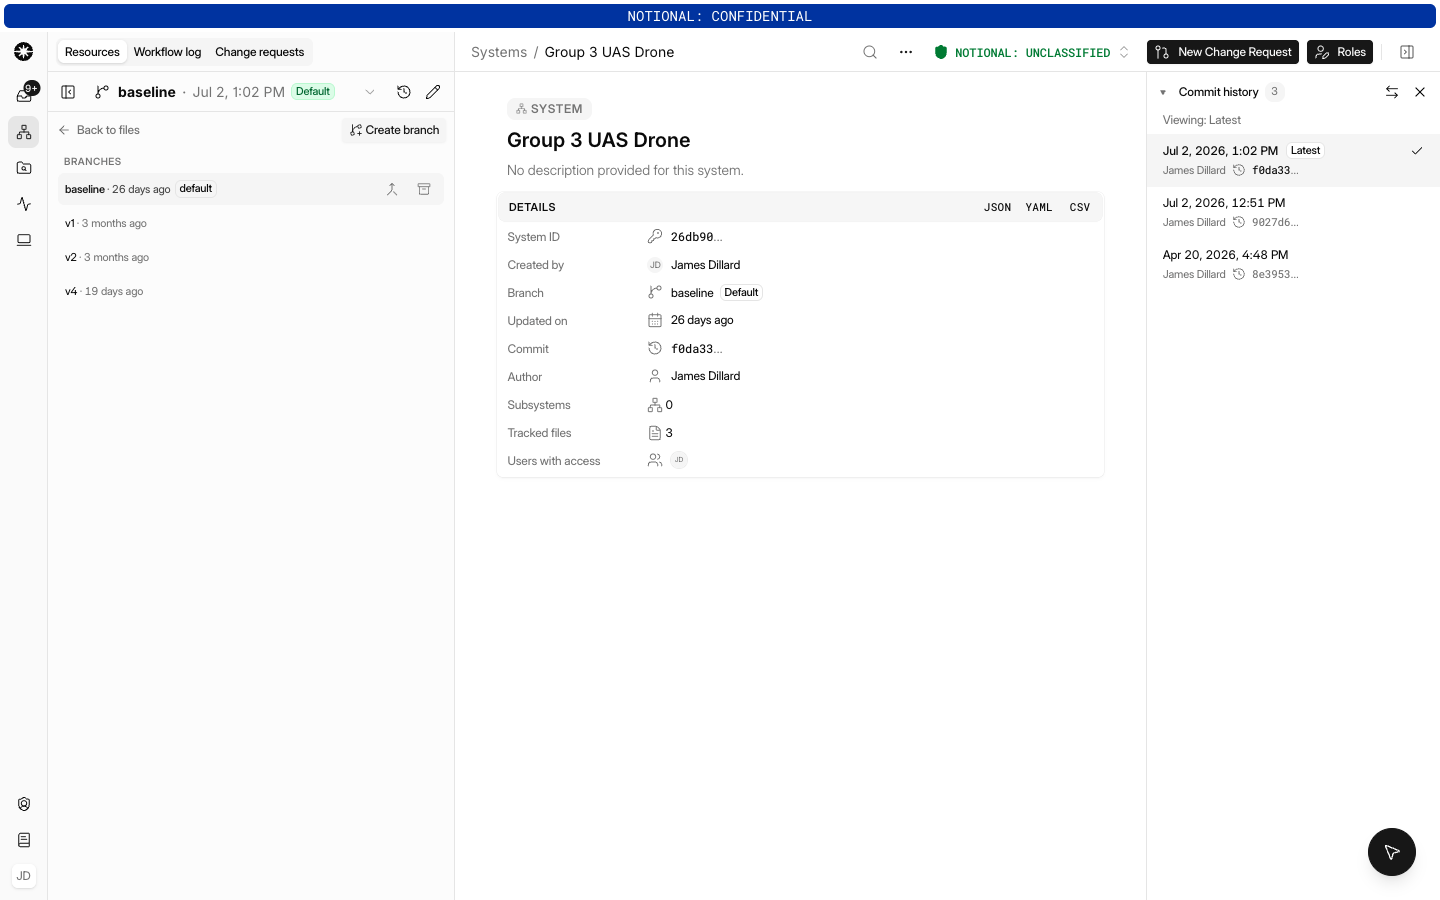
When a branch is no longer active, you can archive it to keep the branch list tidy. Open the branch switcher, select Go to Branches, and use the archive action on the branch's row. Archiving does not delete anything — the branch's commits are preserved, and you can restore an archived branch at any time to keep working on it.
The default baseline branch can never be archived. There is no way to change which branch is the default, so the baseline branch is permanently protected.
Promote a branch
Requires Editor or above.
Promoting updates a target branch so it points at the same commit as a source branch — for example, to move reviewed work into baseline.
- Open the System, open the branch switcher, and select Go to Branches.
- On the source branch's row, click Promote (merge icon).
- In the Promote branch dialog:
- Confirm or choose the Source branch (the branch whose head commit you want to promote).
- Choose the Target branch (the branch that should receive that commit).
- Click Promote.
You cannot promote while viewing a historical commit on the source branch — create a branch from that commit or return to the branch head first.
Commits
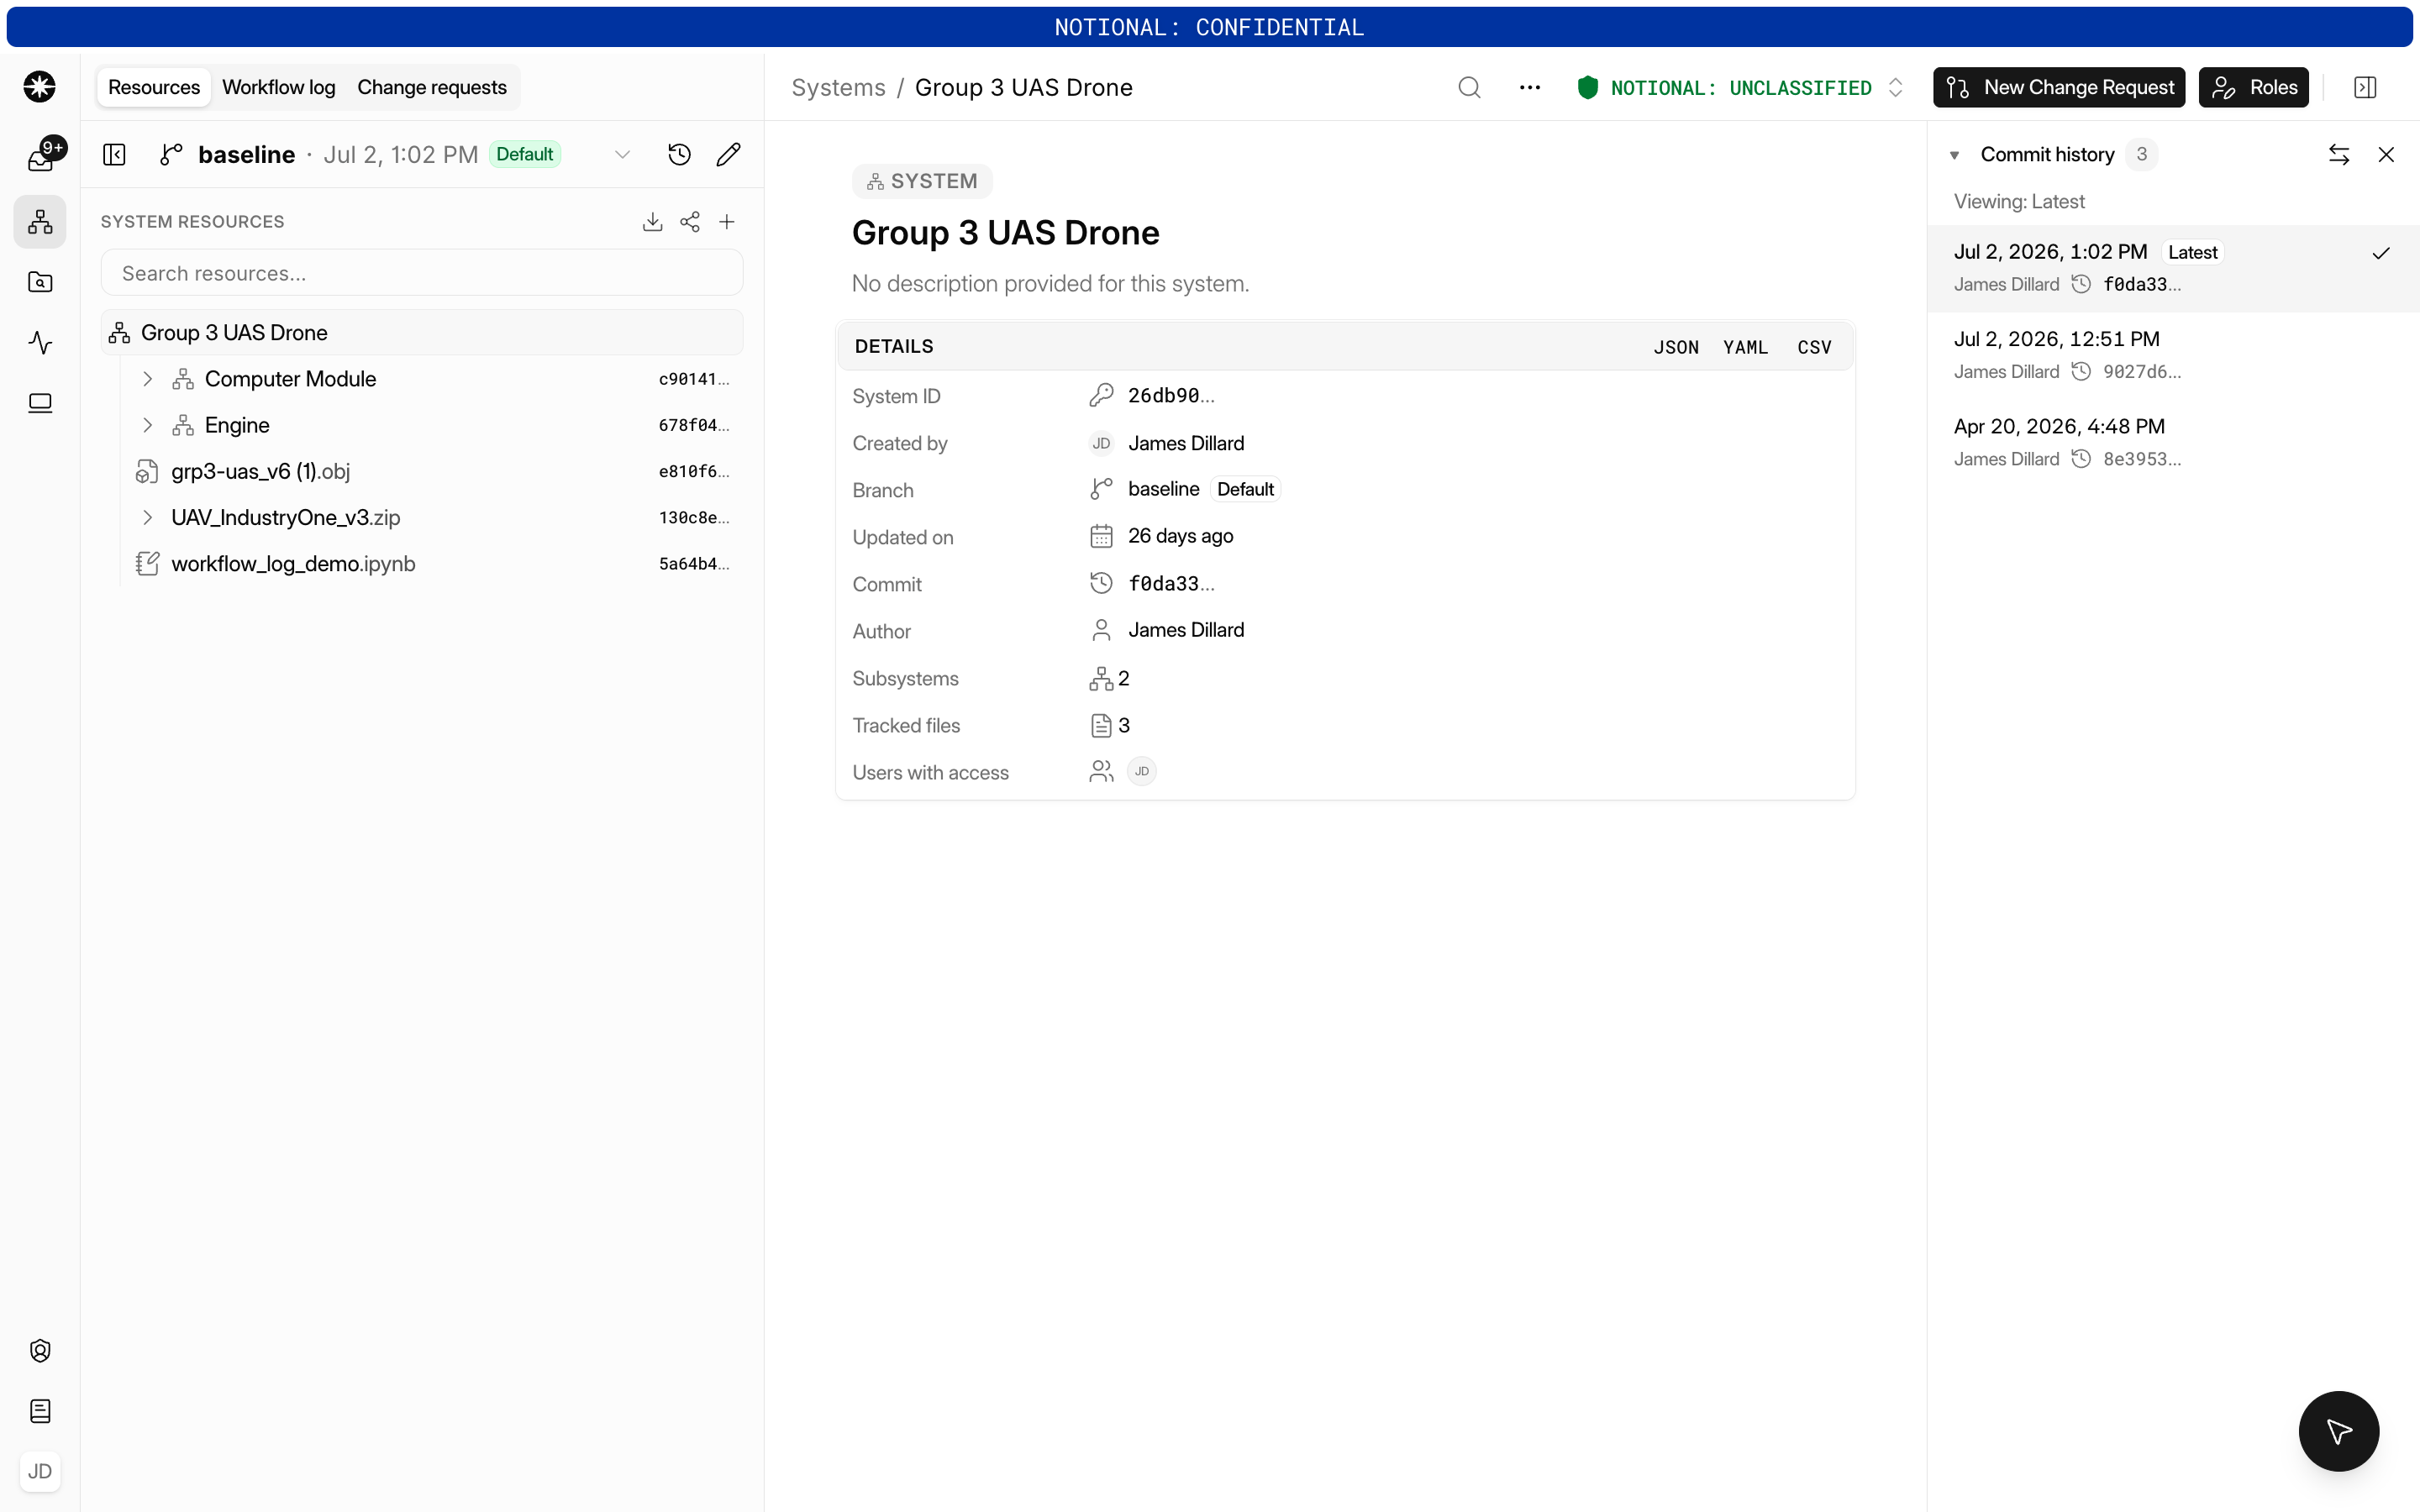
Each commit records a single change to a branch: who made it, when, and an optional message describing the change. The Commit history panel on the right-hand side of the System page lists a branch's commits, newest first. Opening any commit shows you the System exactly as it was at that point — every tracked Resource and Subsystem, at the exact versions they had then.
Change requests
Create a change request
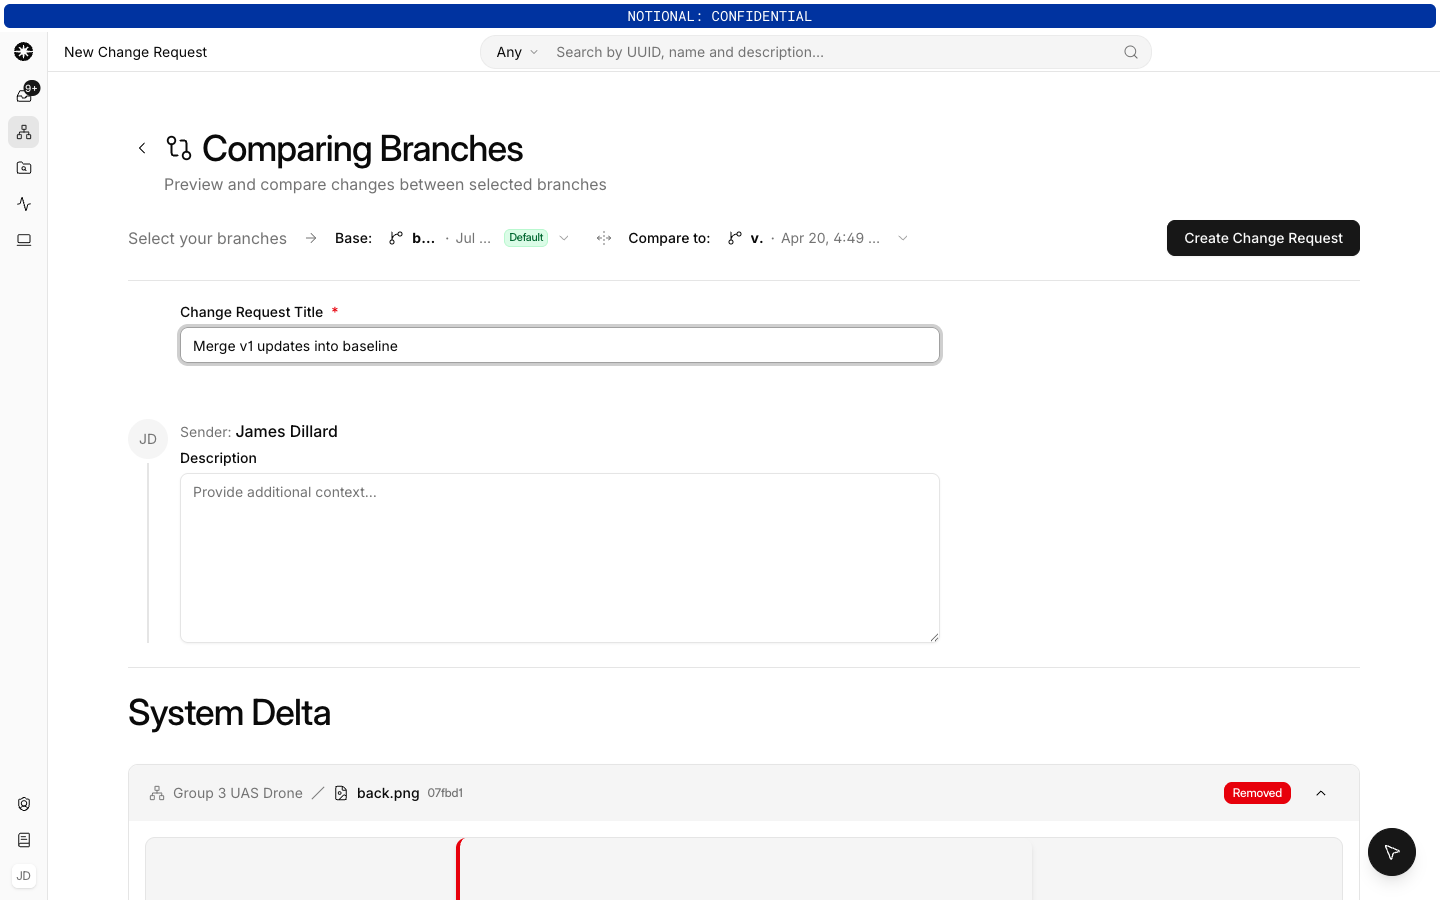
- Open the System and click the New Change Request button in the top-right corner.
- On the Comparing Branches screen, select the Base branch (the branch you want to update) and the Compare to branch (your working branch).
- Enter a Change Request Title and an optional description.
- Review the System Delta, which shows which Resources and Systems were added, removed, or changed.
- Click Create Change Request.
Review and merge
Merging requires Editor or above.
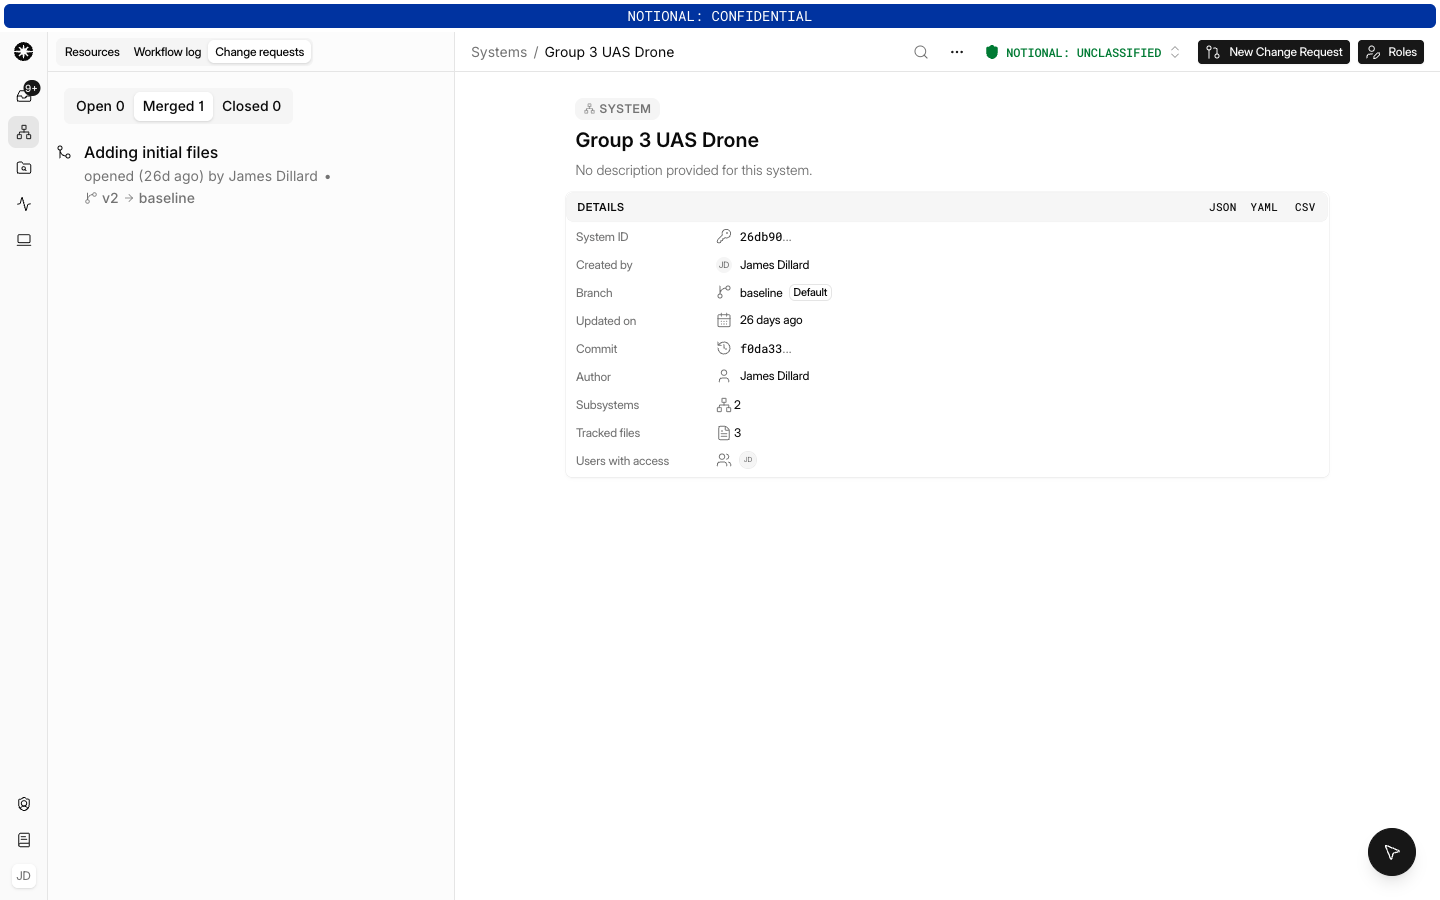
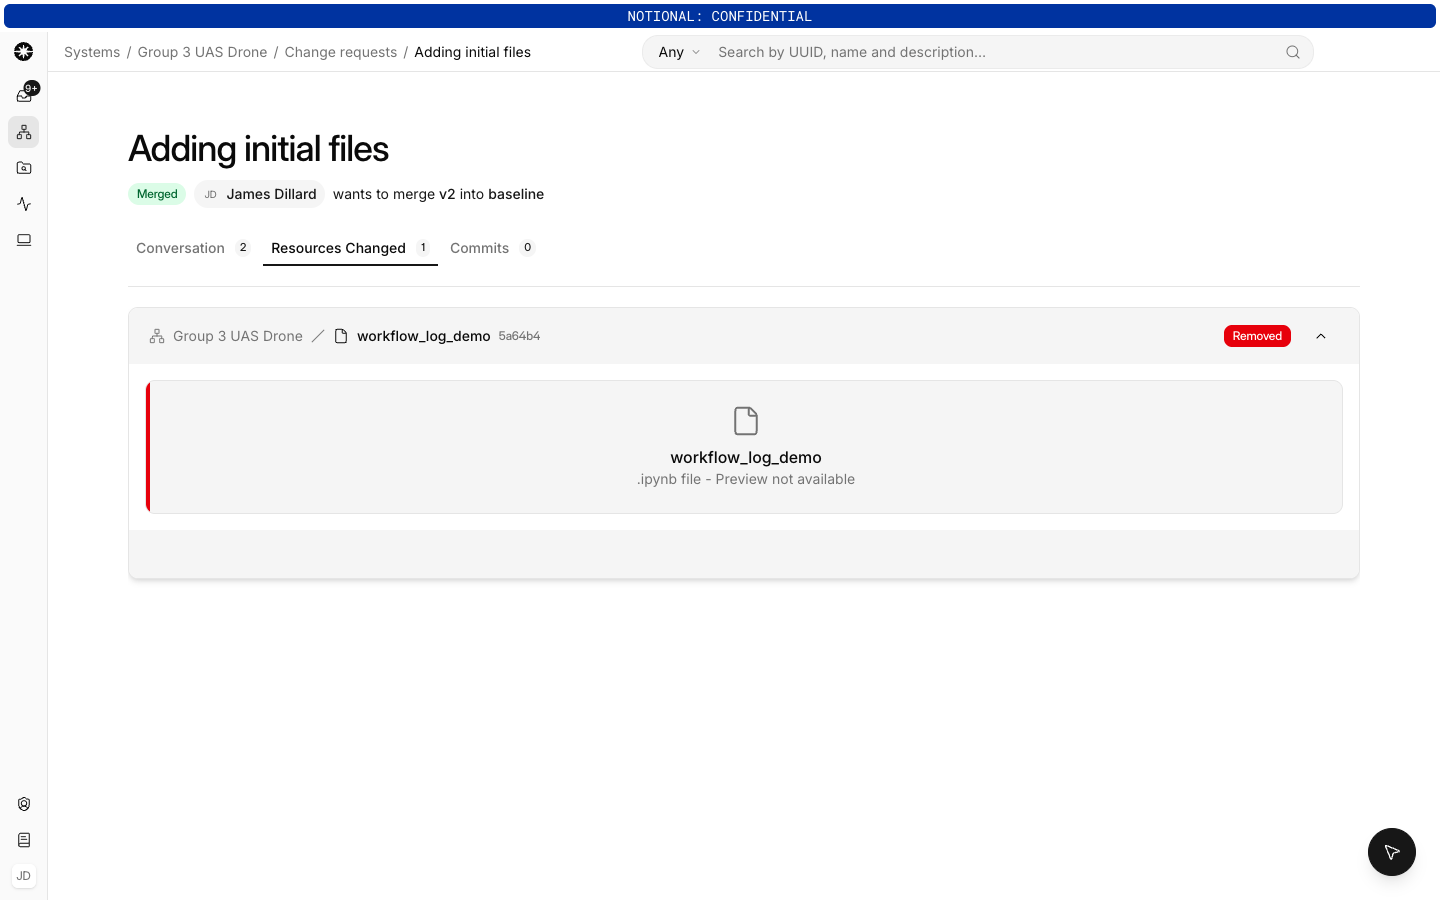
The System's change request list shows each request's title, status, and its source and target branch names, so you can see at a glance what would merge into what. Open a request to see its Conversation, Resources Changed, and Commits.
On the Resources Changed tab, each entry shows a folder breadcrumb for where the Resource lives in the System, and files that were relocated are labeled with a moved tag.
- When you're satisfied with the changes, click Merge Change Request. The base branch now points at the same contents as your working branch.
- To reject the changes instead, click Close.
If either branch has moved since the request was opened, merging is blocked until you refresh — this avoids merging a stale comparison. Change requests have no separate approval step: anyone with edit permission can merge or close them.
Programmatic branching
To create branches, commit Resources, and open or merge change requests from Python, see Branching and change requests (istari-digital-client 10.14.0 or later).
Transitioning from configurations and snapshots
Branches replace configurations, which previous versions of the platform used to manage the set of Resources and Subsystems inside a System.
Your existing configurations were not deleted. They were moved to branches with the same names the configurations had before. You can see them by clicking the branch name in the System.
In previous versions, every update to a configuration captured a snapshot — a complete picture of the Resources and Subsystems at that moment. Those snapshots now appear as commits in the commit history of the branch that replaced your configuration, in the same order they were created.
Opening any commit in the Commit history panel shows the System exactly as it was at that point. Anywhere you previously used a snapshot of a configuration, use a commit on a branch. The contents are identical; commits also stack into a browsable history so you can step back and compare or recover an earlier state.